[-] Prettywhooped@lemmy.world 2 points 1 month ago

My pleasure! I’m lucky to work in a field that I am passionate about, so anytime I can share the passion and possibly start someone on their own journey, I jump at it.

[-] Prettywhooped@lemmy.world 2 points 1 month ago

Voicing the top/back is largely about tapping the braces plates at key nodal locations and listening for pitches and relationships. From there braces are shaved back to allow for more flexibility where necessary.

I’ll admit that this is were the majority of the magic happens to separate an amazing guitar from a good guitar. Unfortunately, it’s almost entirely subjective and every piece of wood is different, so writing up a guide would prove challenging.

It you’d like to know more, Dana Bourgeois has some good videos on YouTube sort of highlighting his process.

[-] Prettywhooped@lemmy.world 2 points 1 month ago

Steam, pressure, and patience.

I essentially have an inside an outside mold that gets loaded with a wet piece of wood sandwiched between slats of spring steel and heating blankets.

As the blankets start to heat, the wood starts to soften and can be slowly pressed into position starting at the waist and moving out along the bouts. This takes a bit of technique as you need to move quick before the wood dries out and stops being pliable, but you also need be patient otherwise the wood could break from the forces.

It’s a balancing act that is actually a lot easier than it sounds.

[-] Prettywhooped@lemmy.world 4 points 1 month ago

Thank you very much! It’s still in need of some voicing and shaping, but should be ready to glue in an hour or two. I’ll snap some more detailed pics of the braces before I box it up.

[-] Prettywhooped@lemmy.world 6 points 1 month ago

Awww shucks… I’m gonna blush.

18
Almost a box! (lemmy.world)

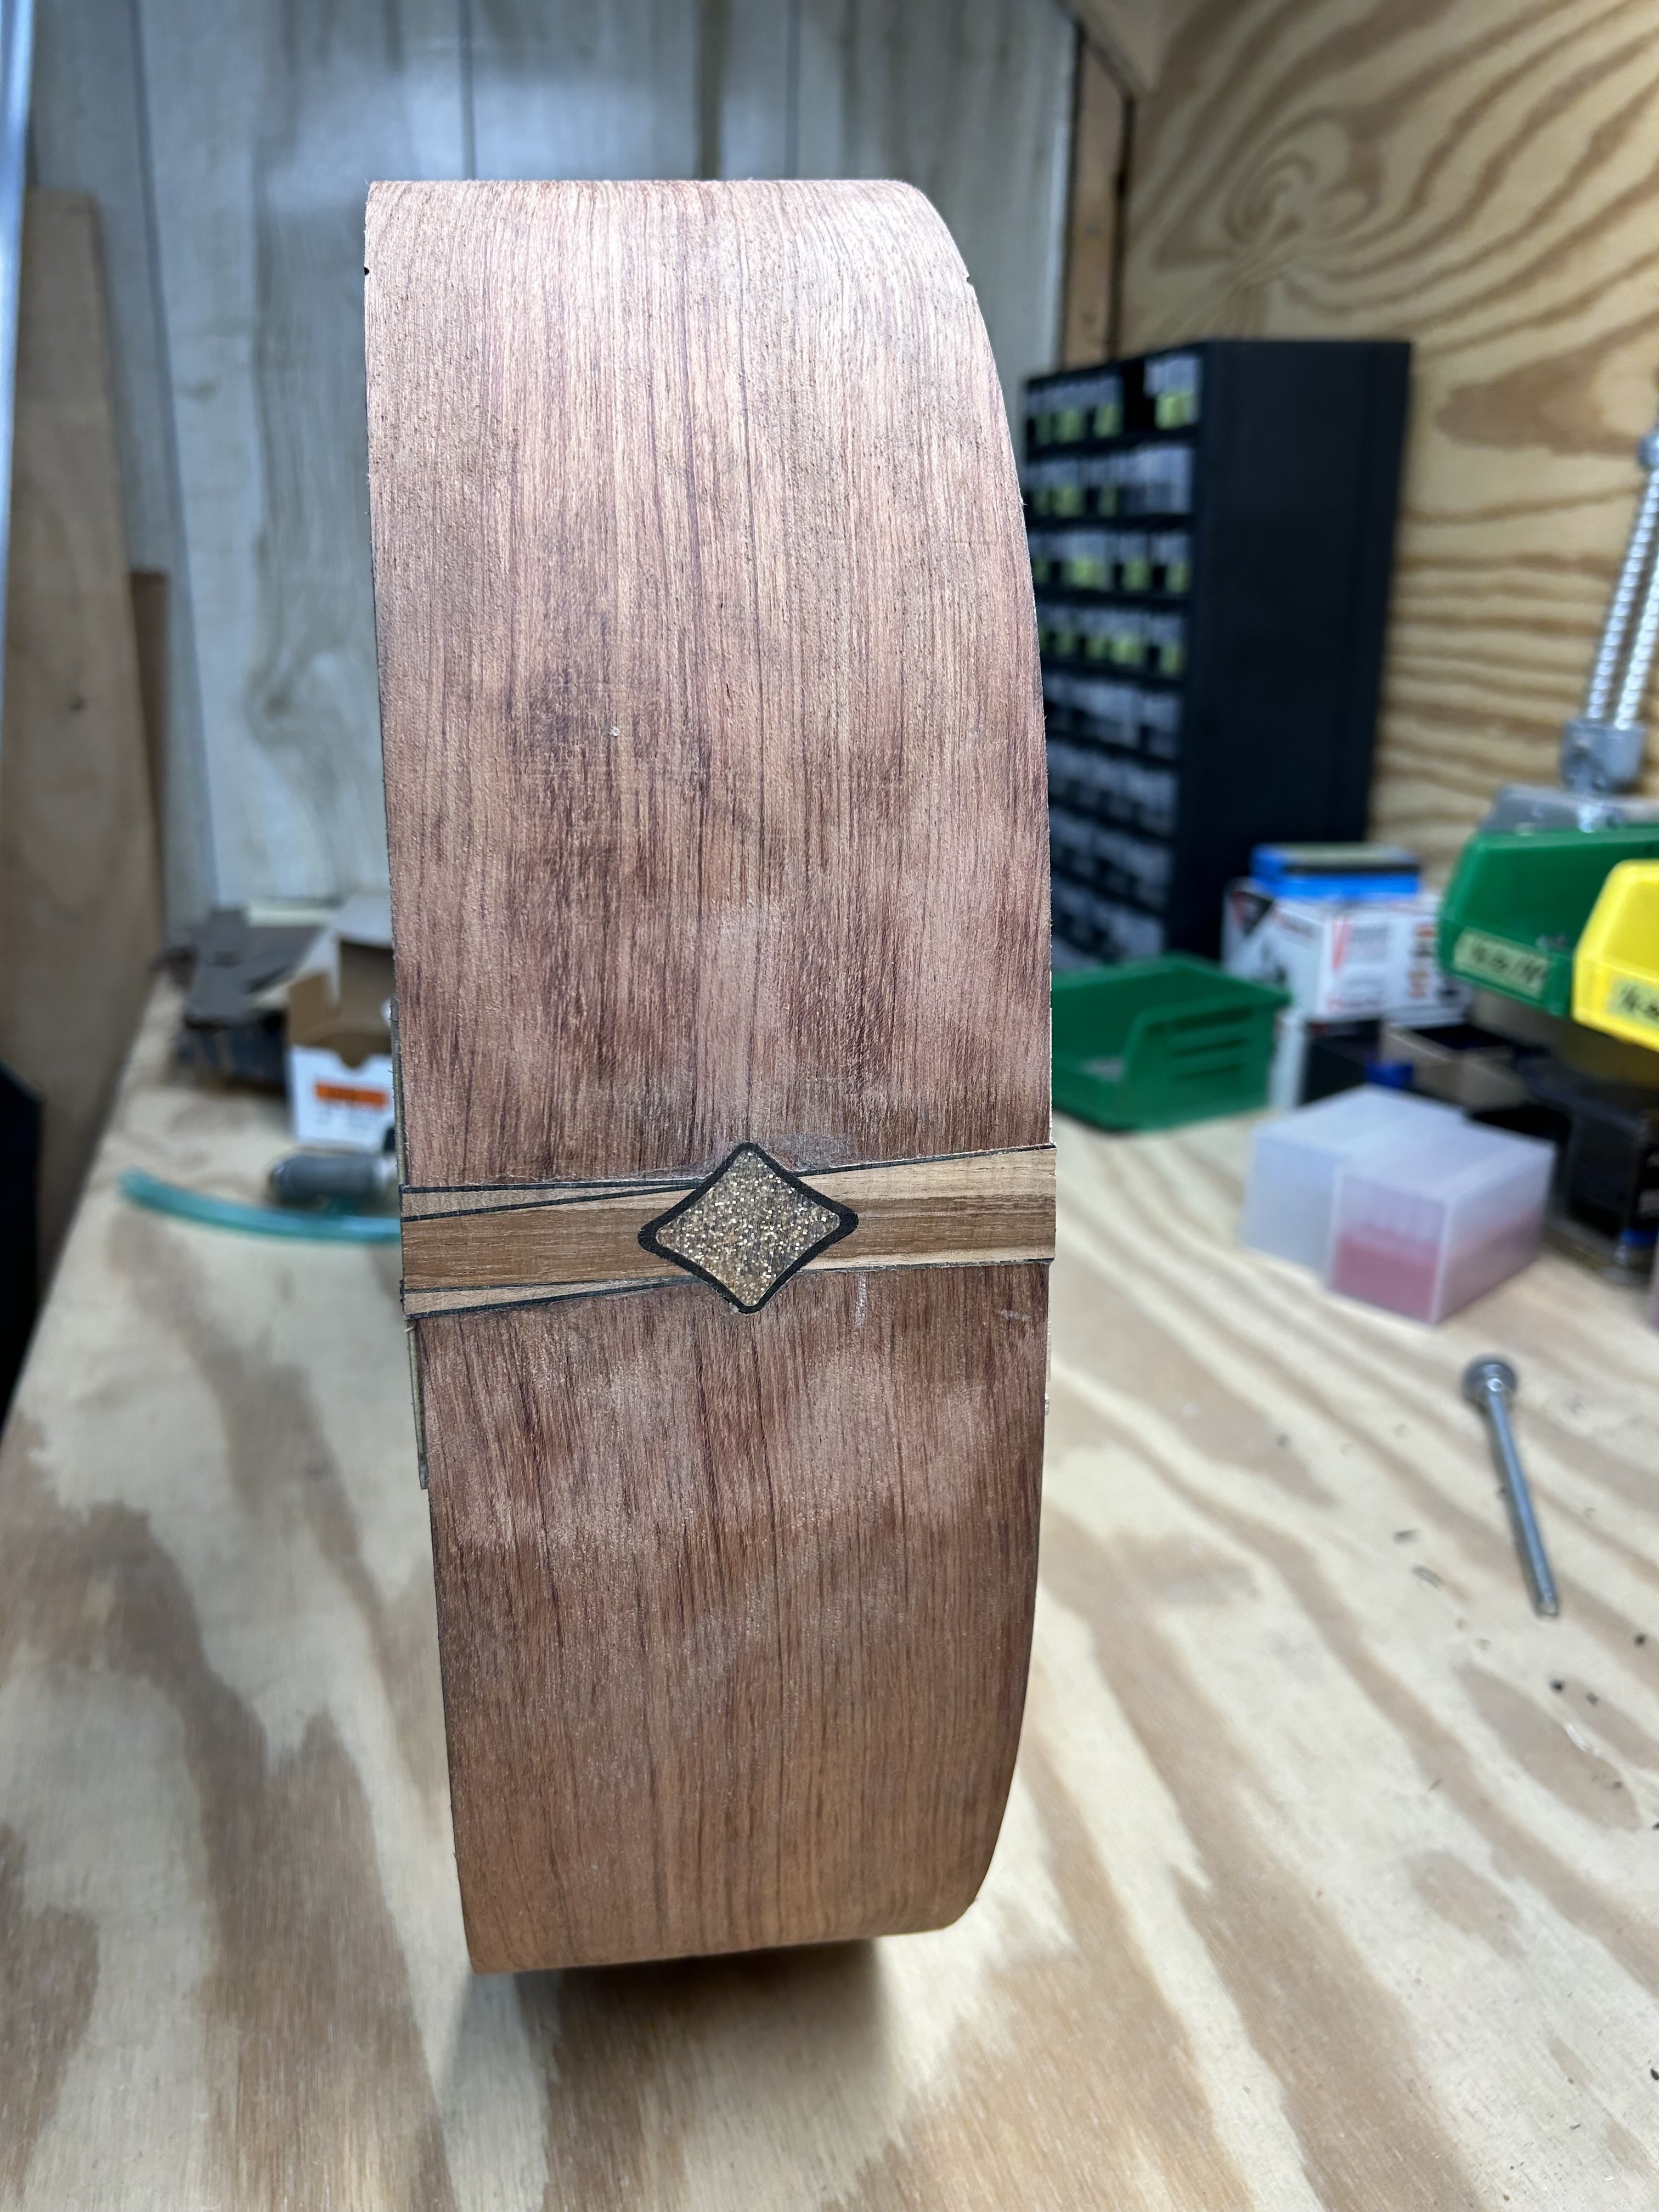
Elbow deep in other more important projects, but I managed to fit in some time to push this OM cutaway a little closer to completion.

Adirondack top (maybe a little floppy…) and bubinga body (assuming it behaves going into the mold…).

I’ve been jokingly calling the buttwedge design the Double Black Diamond (DBD for short). Koa with ebony and glitter bullshit. Figuring out how to safely route the pocket was a fun puzzle that was definitely OVER ENGINEERED. Very pleased with the results though.

Taking suggestions for inlay designs for both the head stock and fingerboard. They’ll both likely be ebony or some other dark hardwood depending on what I can scrounge up. I have plenty of shell, stone, etc. for color and/or detail and a machine that can cut them a hell of a lot cleaner than I can.

This particular guitar is a giveaway item for a bunch of beer drinking craftsmen, so really almost anything goes.

More builds to come soon.

Keep luth’n!

[-] Prettywhooped@lemmy.world 3 points 3 months ago* (last edited 3 months ago)

There’s some decent inexpensive kit guitars out there that don’t require more than an IKEA-level handyman, and some basic tools you’ve probably already got lying around the house.

Take a look around and you’ll be surprised what you’ll find. Stewmac has a simple cigar box kit going for ~$100 right now. Not a shill, they just have quality stuff. You can definitely find stuff much cheaper on eBay and the like, but Stewmac has great customer service and guarantees all of their products. Plus they have a surplus of reference videos and articles on their site that can guide you through the toughest dovetail.

[-] Prettywhooped@lemmy.world 8 points 3 months ago

I highly recommend working through the process at least once. There’s a lot guitar building can teach you about woodworking in general, but my favorite part is learning about the crazy custom tools, jigs and fixtures that different luthiers use to achieve essentially the same goal.

141

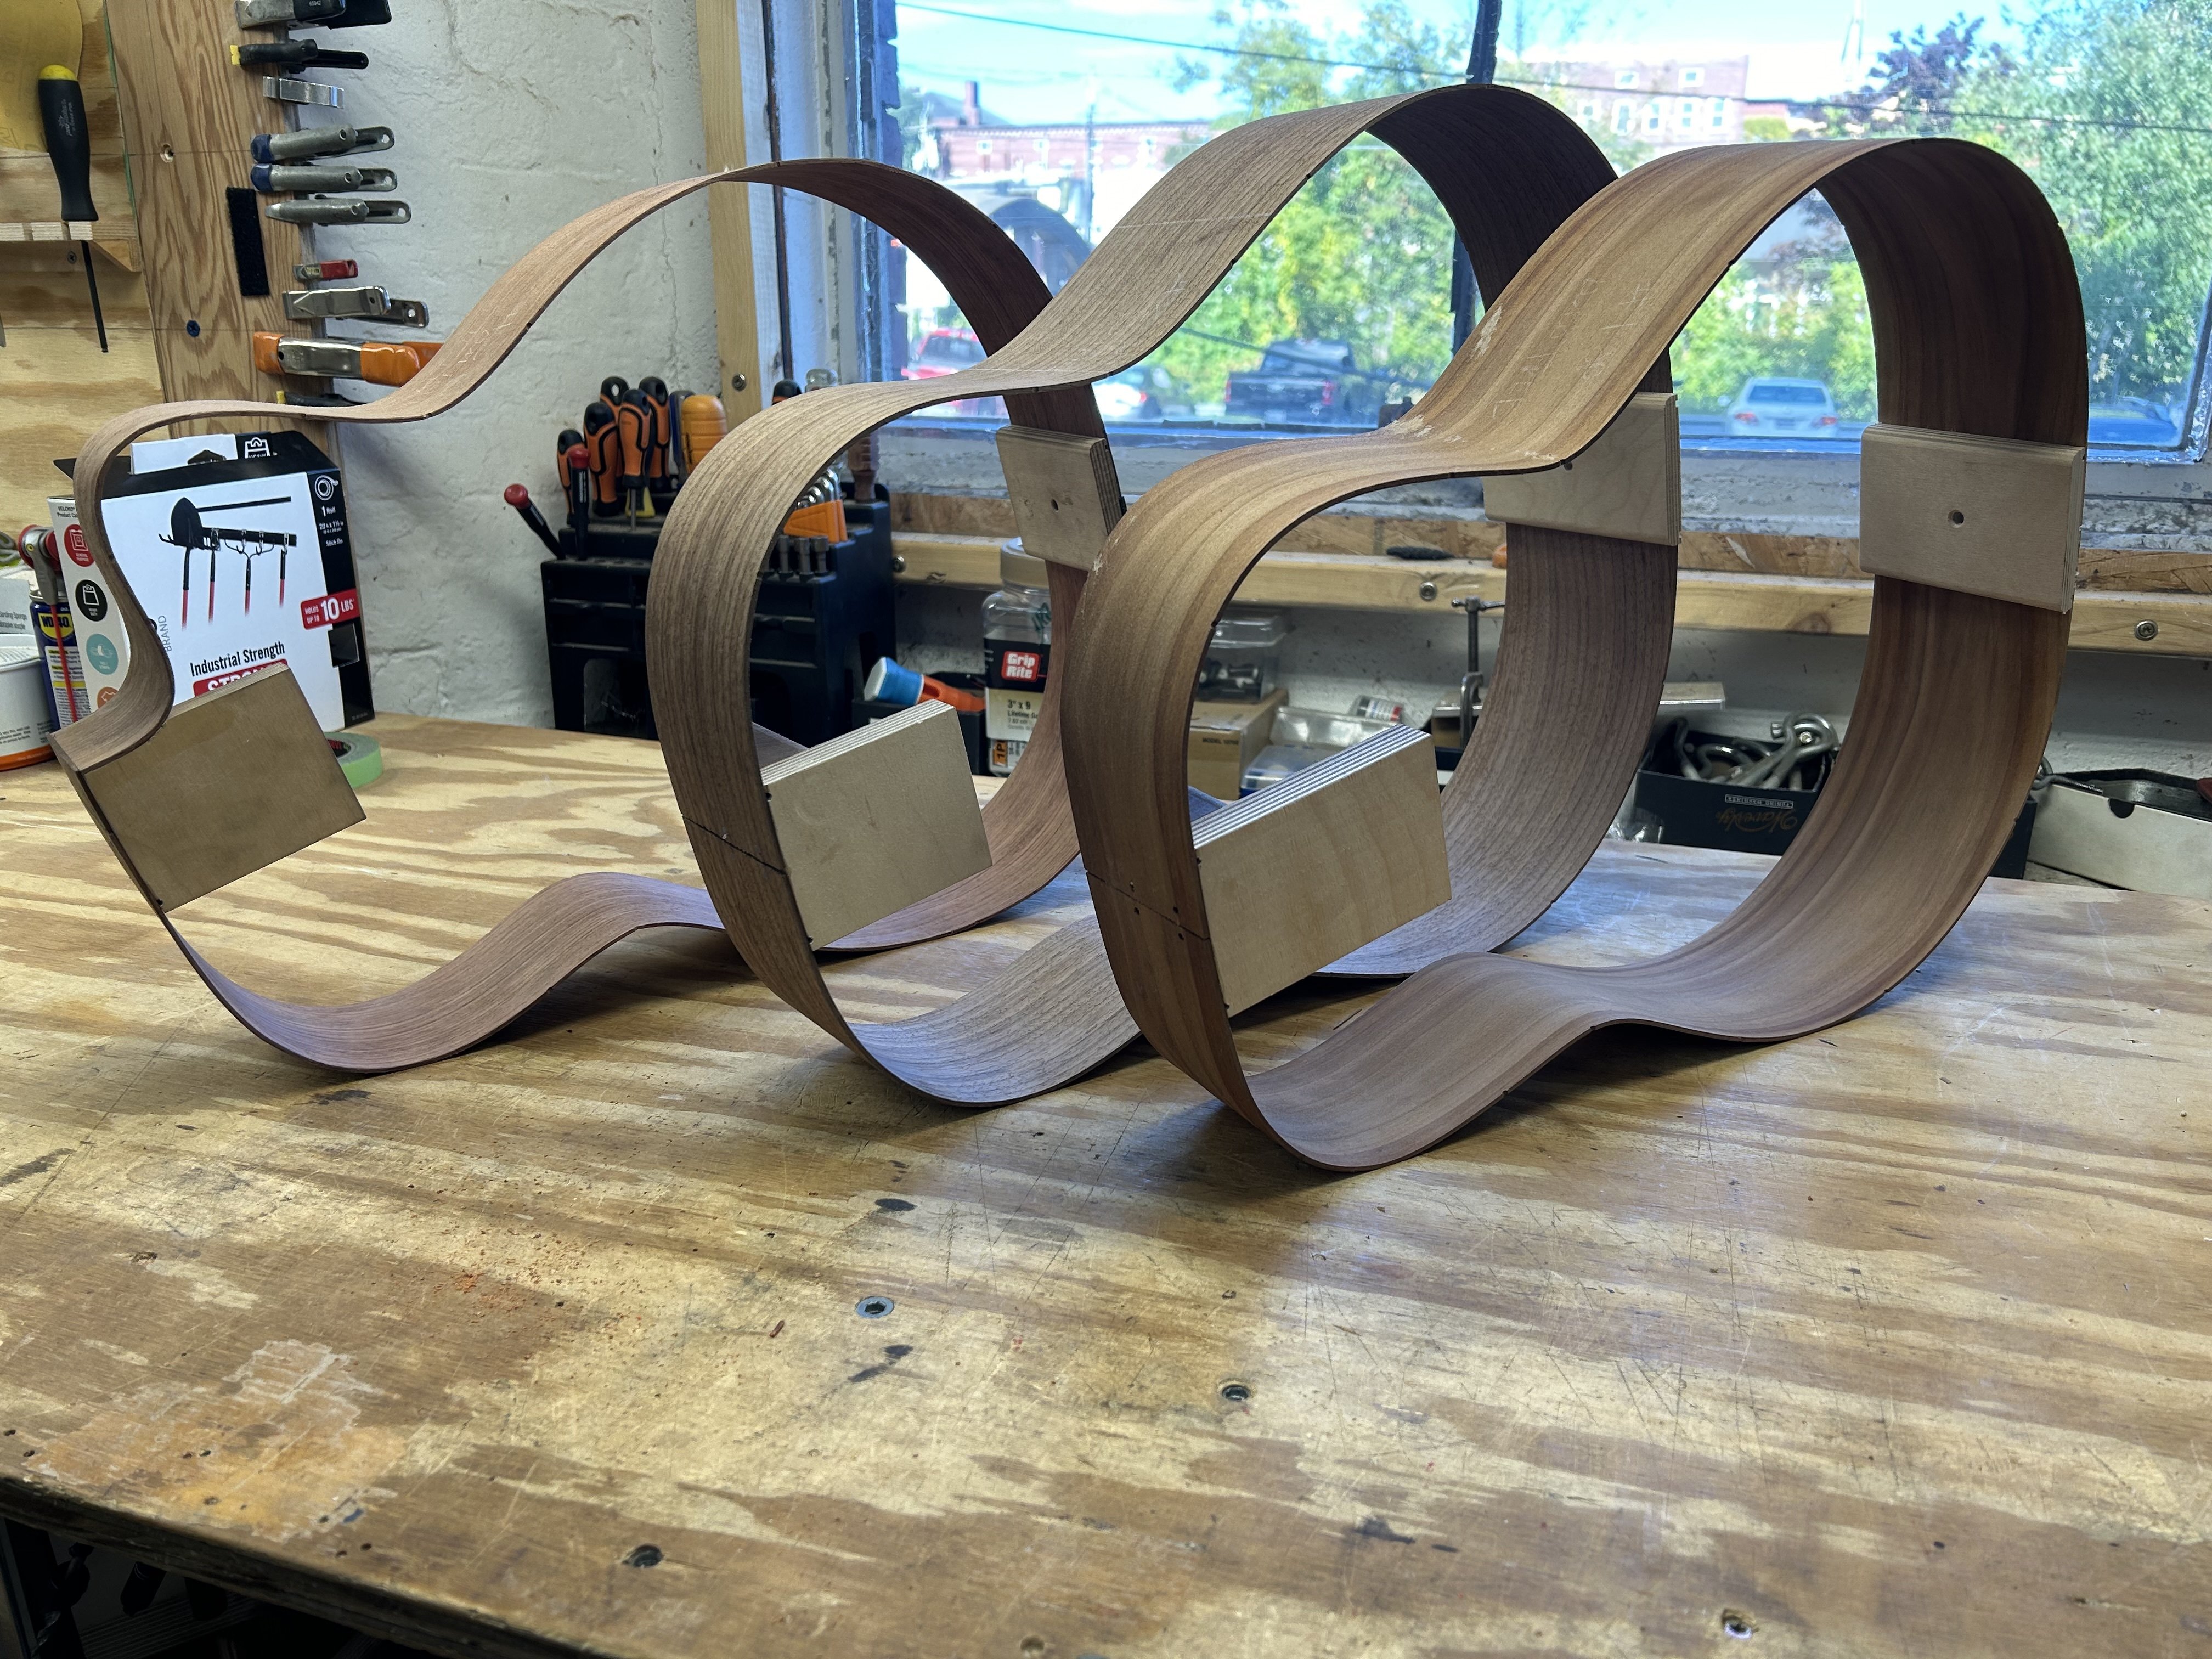
Continued from previous posts. As usual, it took longer than expected, but here are the rims all bent and blocked up. Next steps will be getting the tops and backs all braced up and voiced. After that I’ll install the kerfed lining and side braces, do some final bowl sanding, notch the lining and finally put the boxes together. Simple as that.

Should have more to share in the coming weeks.

Thanks for the support! Happy to answer any questions!

[-] Prettywhooped@lemmy.world 2 points 5 months ago

Steel string flat tops. Standard X-bracing for the most part.

[-] Prettywhooped@lemmy.world 2 points 5 months ago

Just wait til I show off my buttwedge

[-] Prettywhooped@lemmy.world 2 points 5 months ago

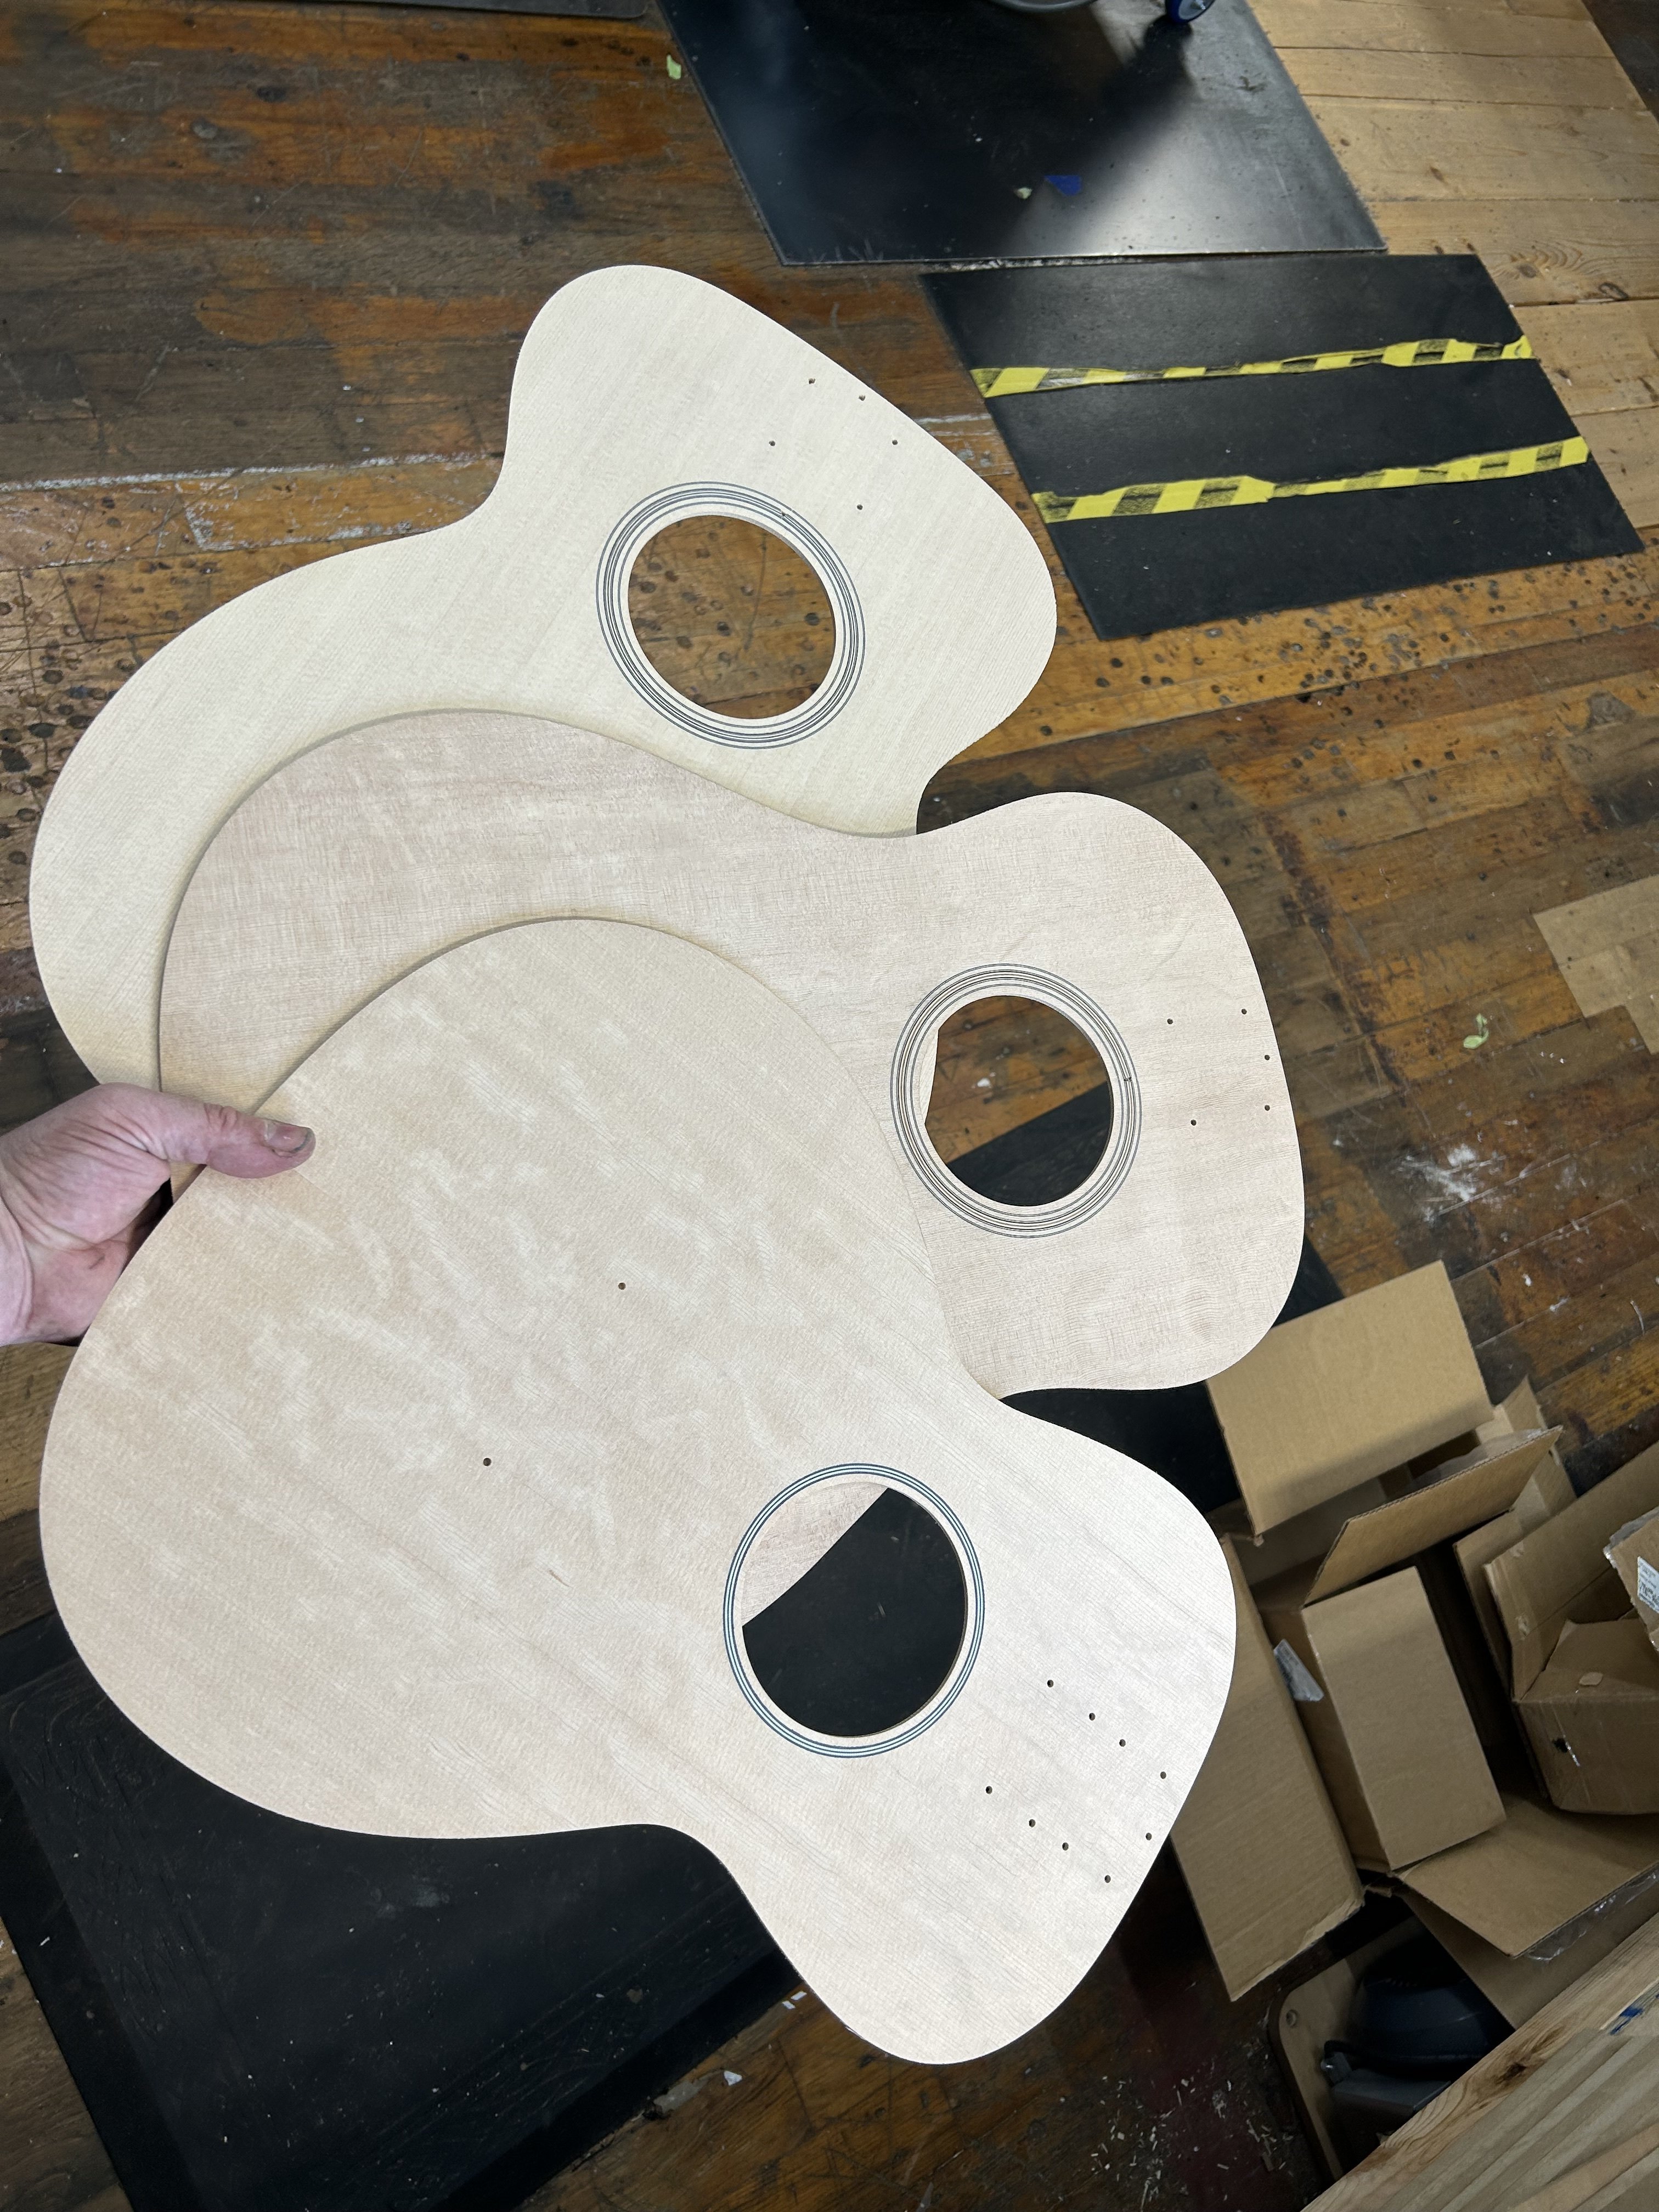
They’re all guitars.

From left to right: OM, slope shoulder OO, slope shoulder dread.

Those “corners” are tabs for machining. Location references for other jobs later on.

27
submitted 5 months ago* (last edited 5 months ago) by Prettywhooped@lemmy.world to c/luthier@lemmy.world

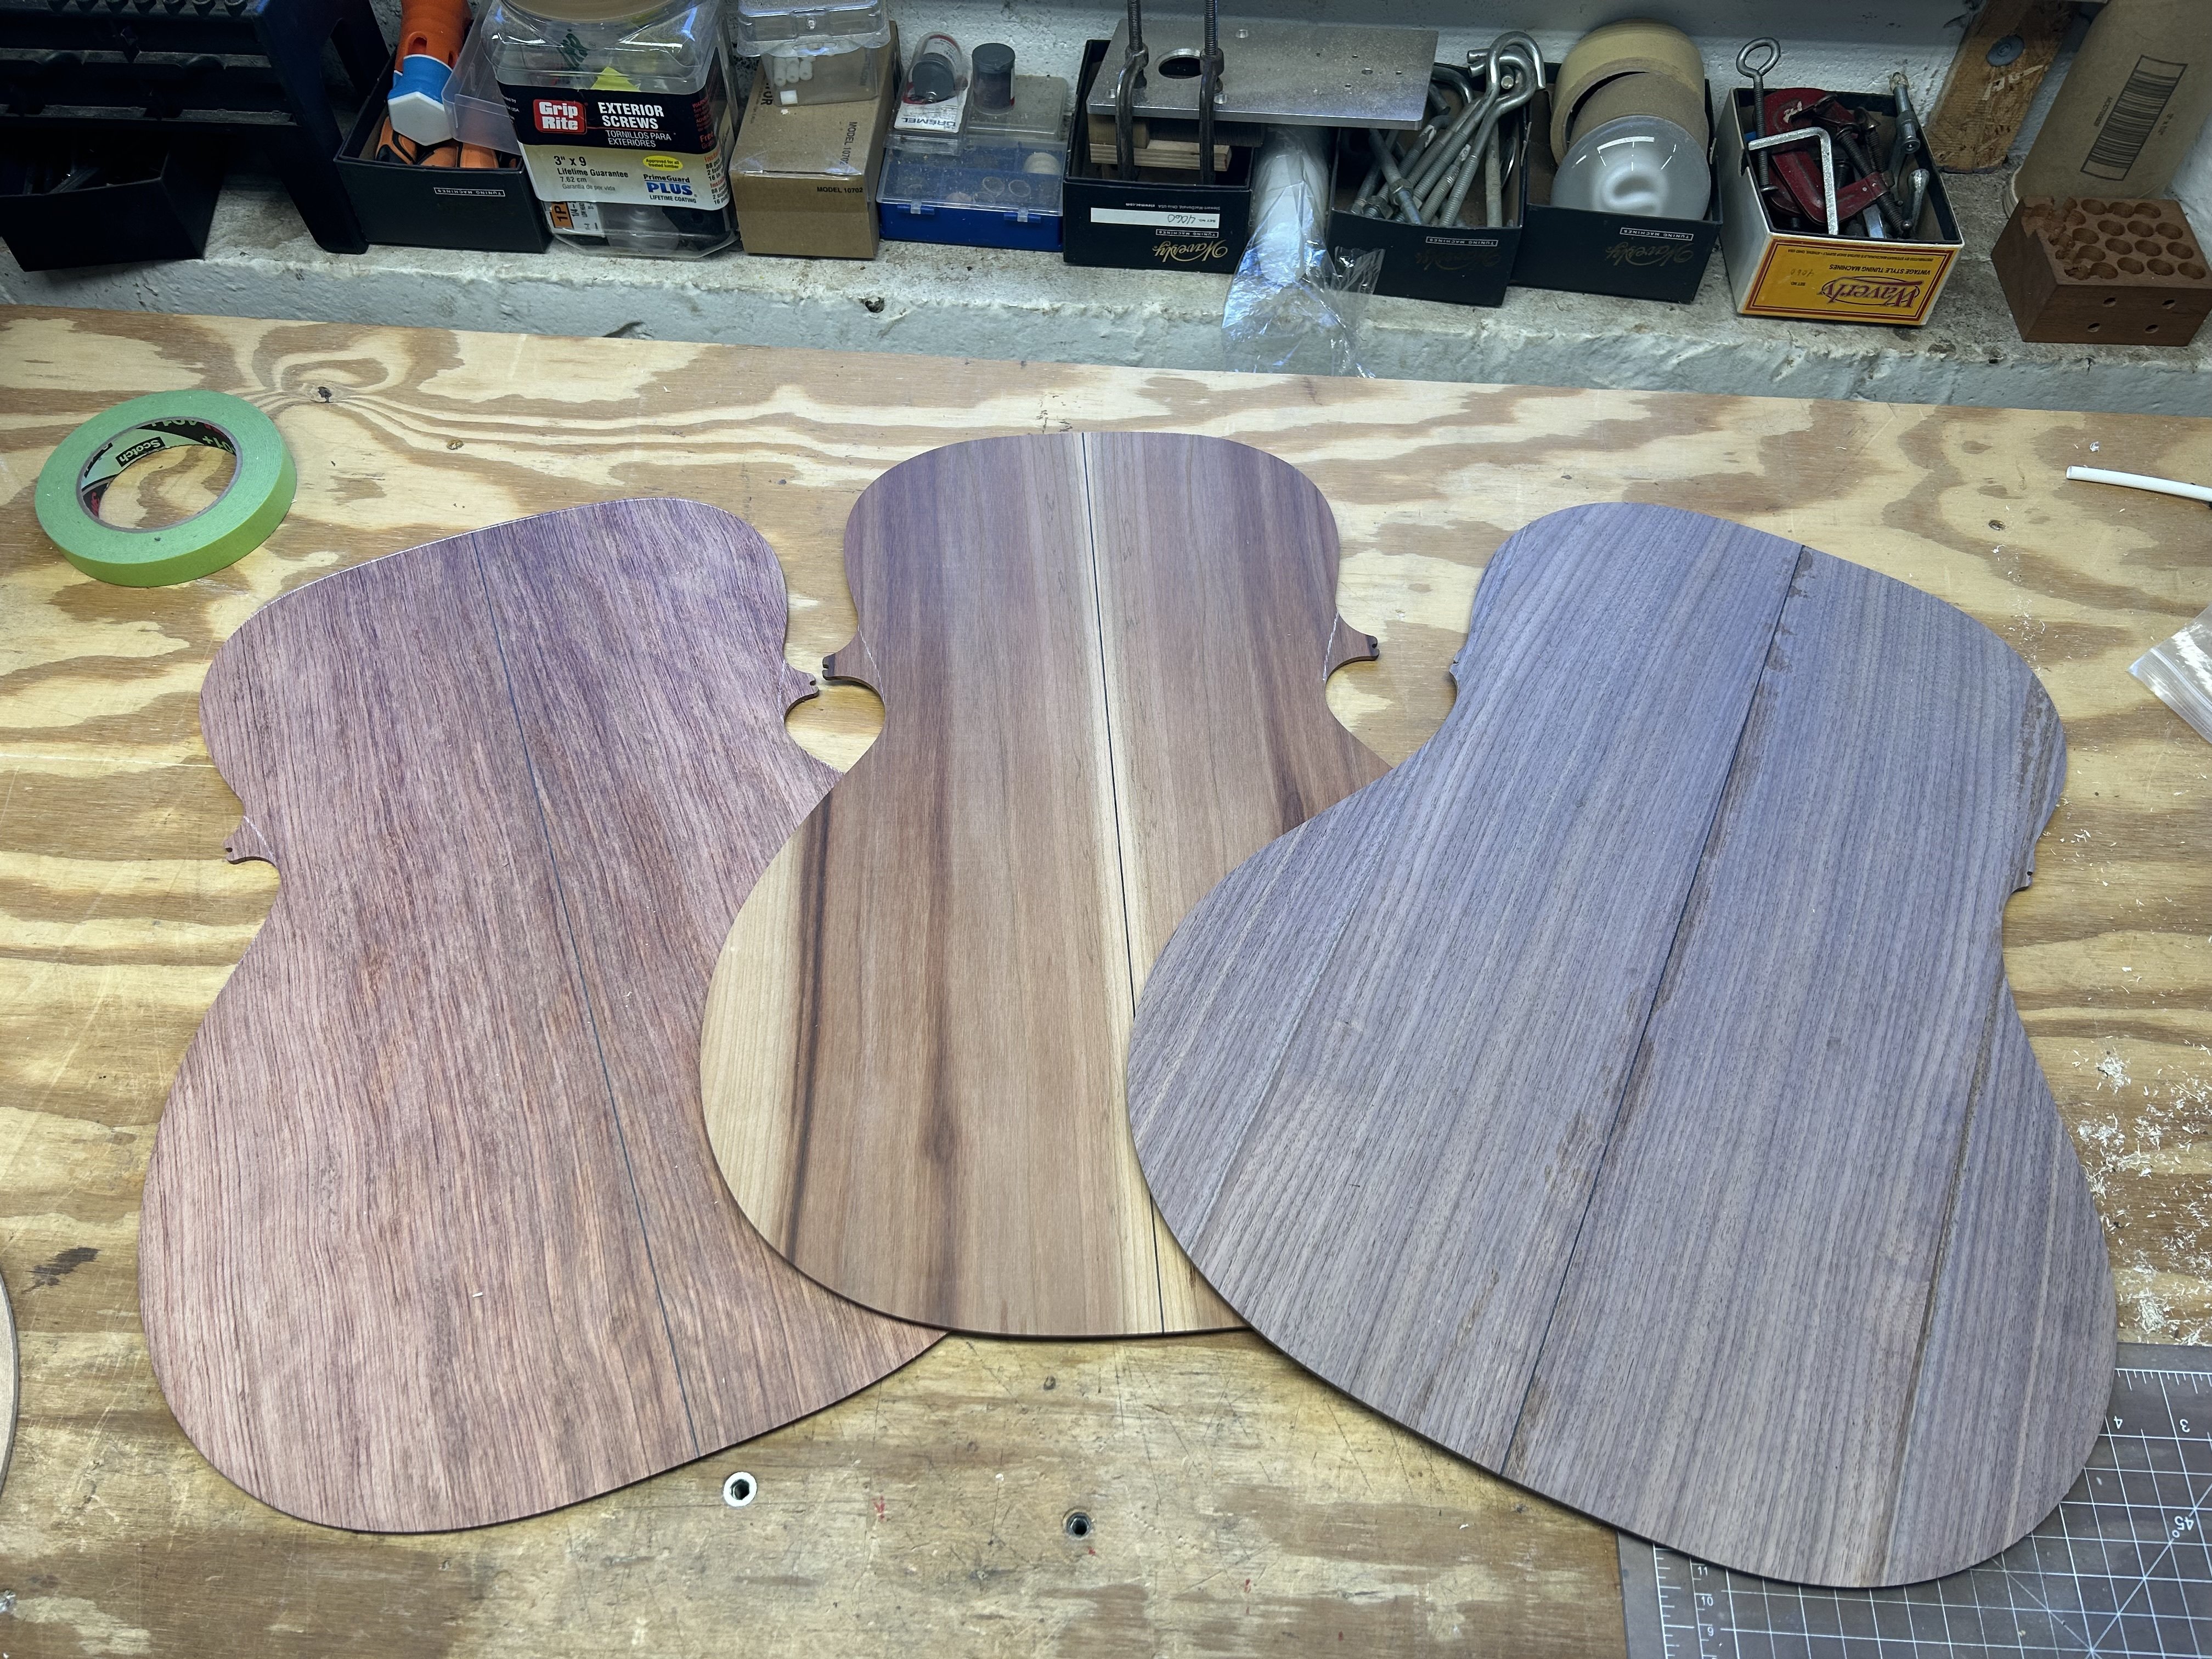
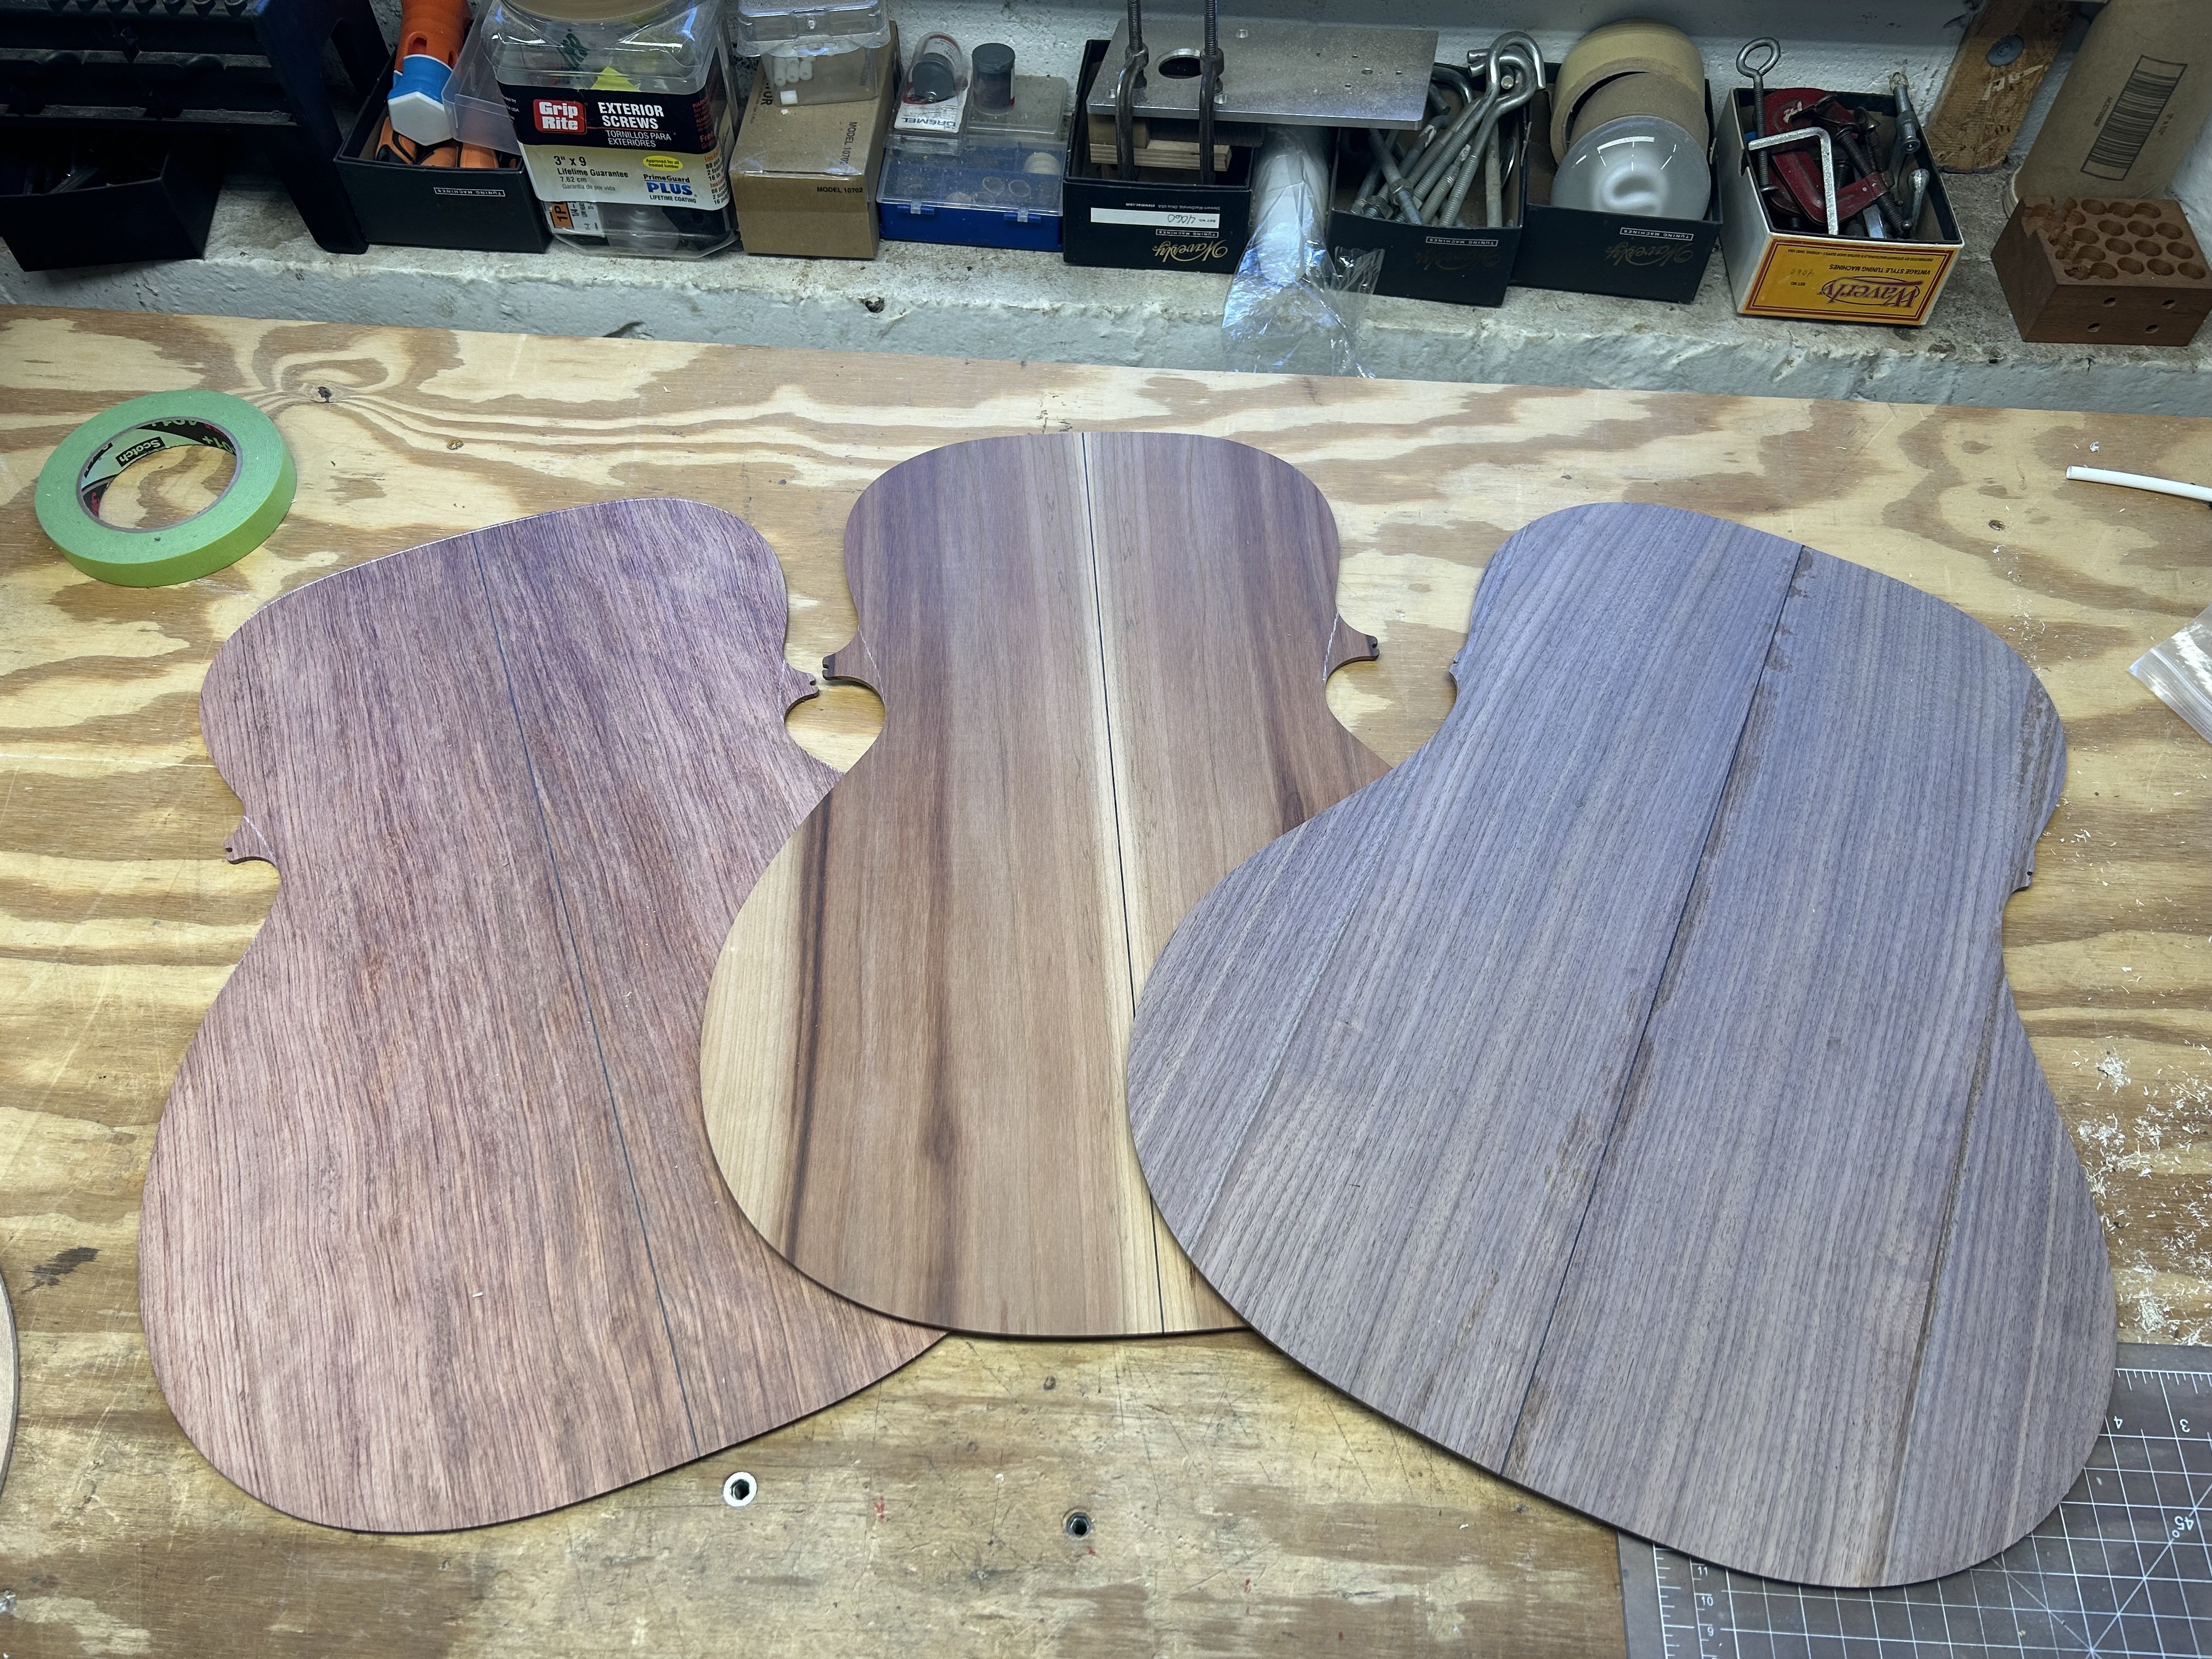
Bubinga, Plum, and Walnut (yes it’s 4 pieces; I had to get creative and it’s getting color so you’ll never notice 😄)

54
submitted 5 months ago* (last edited 5 months ago) by Prettywhooped@lemmy.world to c/woodworking@lemmy.ca

Bubinga, Plum, and Walnut (yes it’s 4 pieces; I had to get creative and it’s getting color so you’ll never notice 😄)

[-] Prettywhooped@lemmy.world 2 points 5 months ago

Thanks! I’m hoping to get the rims bent this week, and hopefully blocked up. Maybe if I say it on the internet then it’ll actually happen…

23

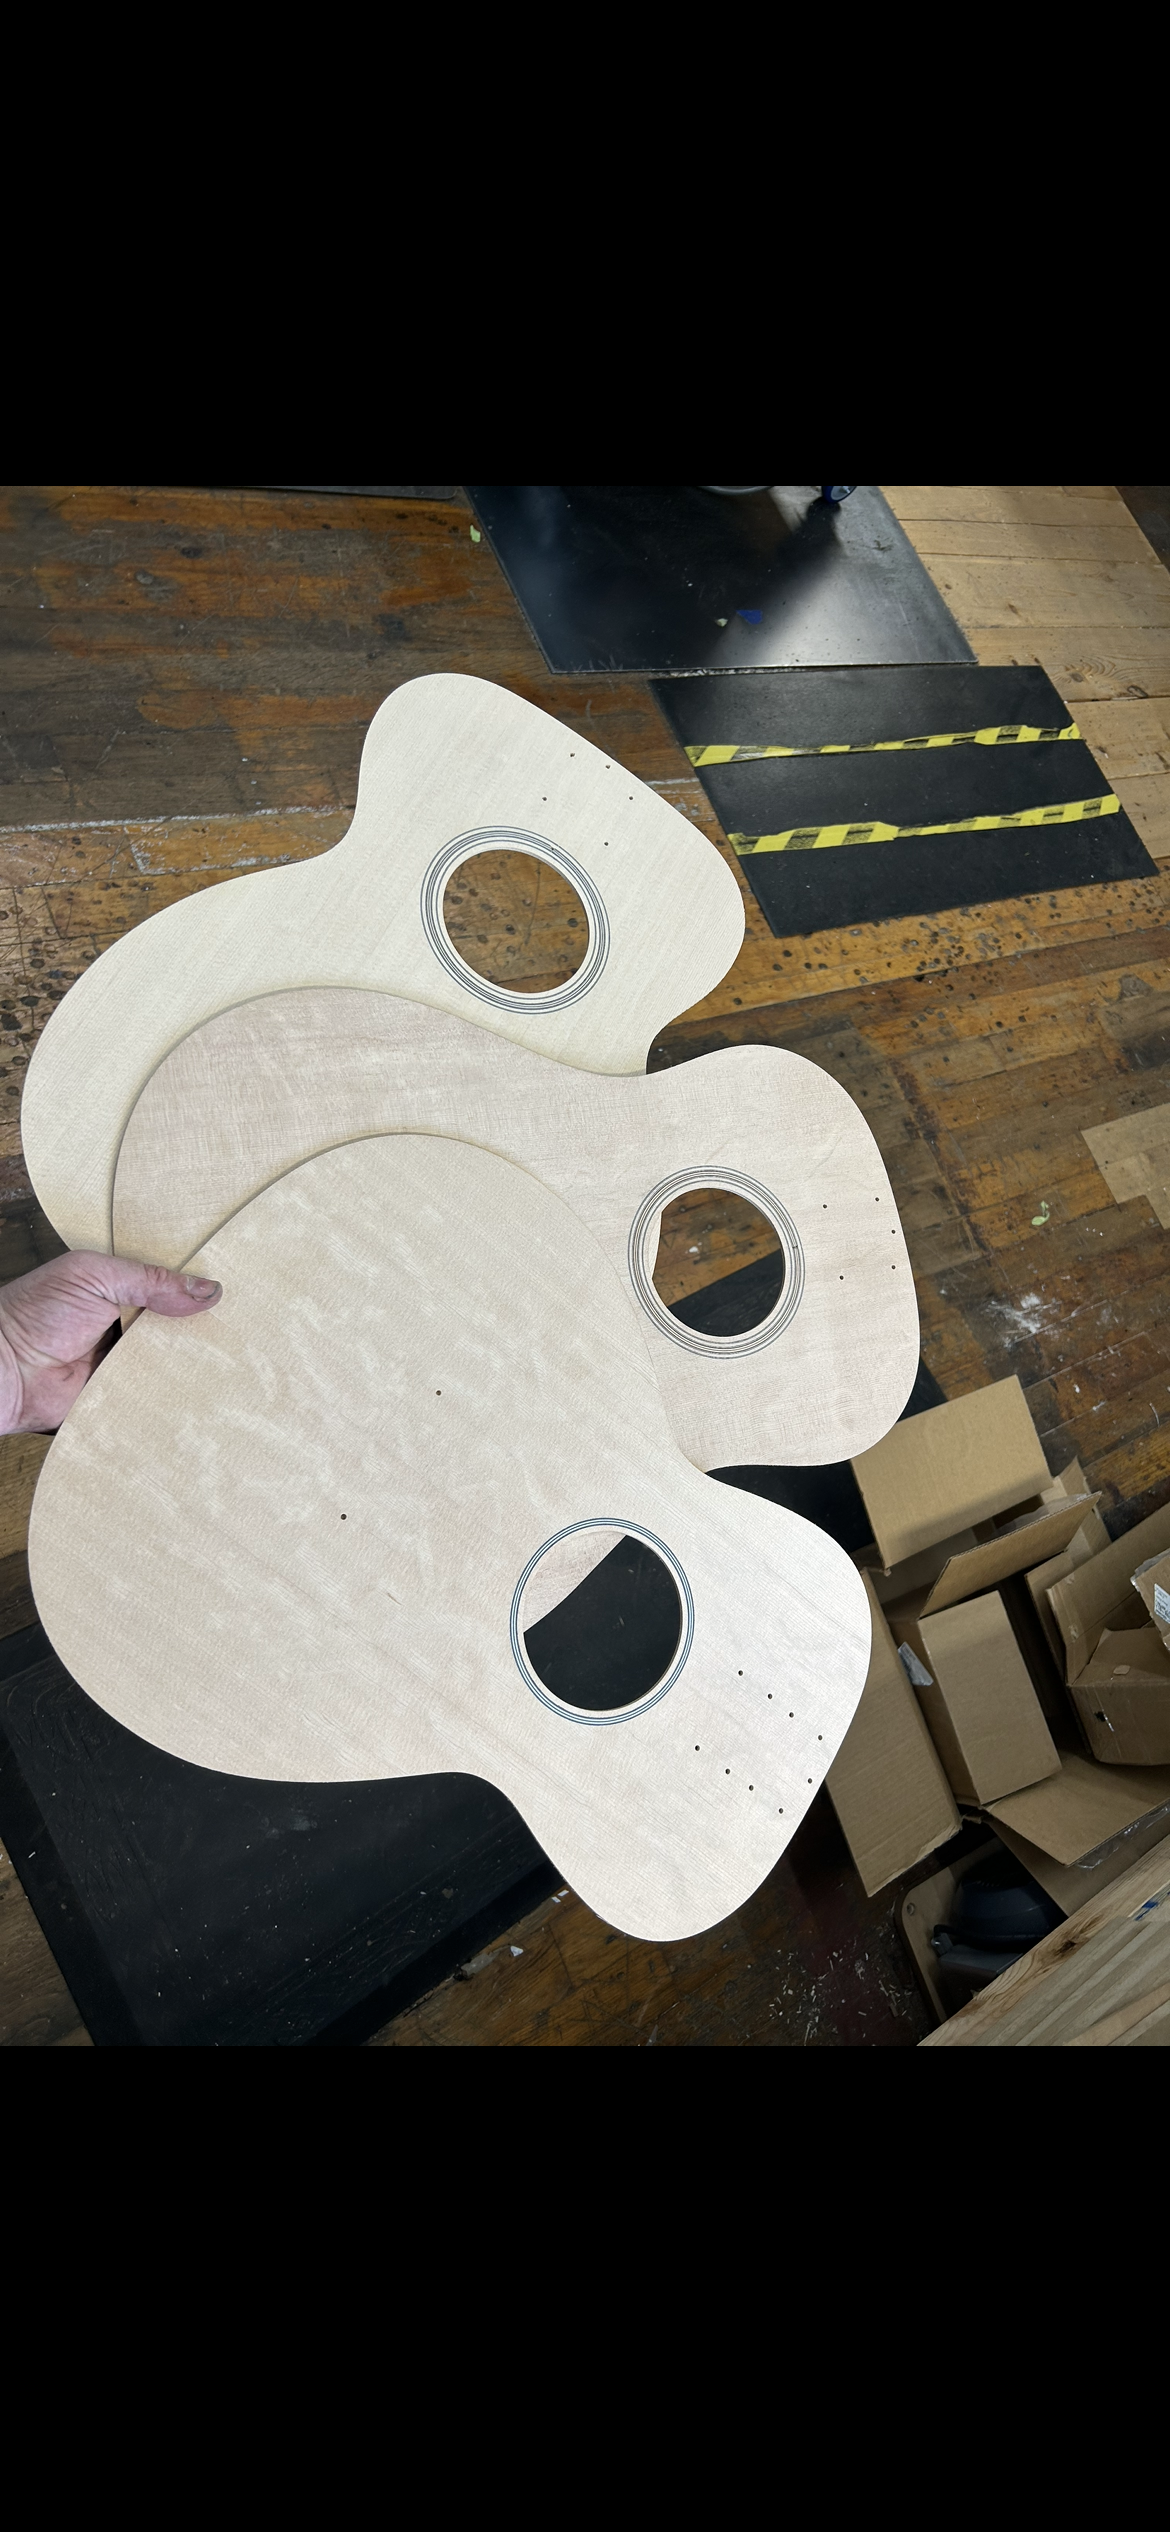
It’s all Sitka. Back and sides to follow.

71
submitted 5 months ago* (last edited 5 months ago) by Prettywhooped@lemmy.world to c/woodworking@lemmy.ca

Everything is Sitka. Back and sides will follow shortly. I’m what you might call a professional.

[-] Prettywhooped@lemmy.world 17 points 1 year ago

I believe the suspect that the police have identified was a firearms instructor at a military base down in Saco.

3
view more: next ›

Prettywhooped

joined 2 years ago